24 Feb 2015

Observed!


New project! I'm calling it observed. 
Vine like plants engulf weathered and worn architecture structures. Textures impressed, encapsulated and transferred. Experiential design brings us closer to nature. Natural materials are distorted.


Embroidered Inspiring Words


Using my Brother embroidery machine I made these words, inspiring words what shal I use them for???

Vintage style Spring Greeting Card Collection


Using distressing tool for the paper edges, stitching on my sewing machine and stamps, cutting out shapes and letters with my die cutting machine I made this card collection.


Alcohol Ink


Alcohol inks, blending solution on clear plastic, the colours are stunning 

2 Feb 2015

Amazonite, Sea Opal and Tibetan Silver Tribal Jewellery Collection

Using my favorite tribal geometric shape - upside down elongated triangle I made this collection with semi-precious stones.


I took my inspiration for these silver earrings from my research on the spine whilst doing my "Olmec Queen" project.


This set was also inspired by my tribal research however I was asked by a very good friend to make this for a birthday present.


Red Coral Tribal Jewellery


Following the month of Tribal theme within my Art and Surface Design work I just had to make some jewellery with stone and silver beads too. This collection is made using Tibetan silver and Red Coral beads.


Tribal and Geometric Sketchbook Pages

This is part of my "Inspire" Project which I entitled "The Olmec Queen"

Key Words:
Fused, Distorted, Bold, Skeletal Structure, Tribal, Colourful, Chunky, Beads.

The aim of this project was material research and exploration. These are my sketchbook pages. There is another post called "Tribal Inspired Jewellery Bead Design" which is also part of this project.

I have had a fascination with beads for 10 years now and they often feature in my work in some form or another. I used some of my many photographs of my collections in this project to generate pattern form and shape. I made lots of stencils and moved from rounded shapes to geometric shapes then combined the 2.


Reactive Dye Colour Bleeding


Creating a colour bleed pattern with reactive dyes is easy and fun by randomly splatter the reactive dye on  the reverse side of a silk screen in different colours. You can then make the colours bleed by either using a pipette and water to make the colours run into each other or use clear plastic shrink wrap like I did here.


Once they are fully dry the Manutex paste needs rinsing off in cold water then they need to be steamed, here is me using the steamer.


Removing the pins....


Tie Dye to CAD Digital Textile Print

 I love tie dyeing. I always feel so excited when I open them up to see what unique pattern will be on the fabric. I wanted to use my Photoshop skills to create a repeated pattern for textiles.


 This is a cropped scanned image of a section of the red and blue one.


 I then began to break it down using mask tools, fill in the spaces with other sections then repeat these are the four steps.


I used the colour alteration functions and inverse to get these variations 


 In these two examples I used the fx to create fuzzy shadows around the outlines and inverse to give them a neon glow


This last example is my favorite, I used a smudge art filter to make it fuzzy 


Tribal Inspired Jewellery Bead Design


This is part of a project I did in my final year of uni called "Inspire" The aim was to research materials. I chose a tribal theme and bead making for my final pieces.

Trend research for Tribal Jewellery


The CAD generated theme board I did for my final project.


 These beads were all made by wrapping fabric, melting iridescent film, metallic threads and plastics around a metal skewer then blasting with the heat gun. I then threaded them onto pins with metal beads and attached them to some fabric I had dyed to create a "body necklace"


These beads I made using polymorph plastic which was really fun. I meted the pellets in some warm water then molded them into these shapes using a thick pin to make the holes. I painted them using acrylics and gave them a metallic shimmer using gilders paste.


I love making beads!


Making chunky beads from scratch


Collection of beads made from clay, crepe paper, Angelina film and shrink magic set in UTEE (ultra thick embossing enamel)


 I used various stamps to emboss a pattern into the clay and cutters to make shapes and also some free hand molding to make shapes. Using a 70mm head pin to make the holes before baking the clay.


My concentrating face :-)


 I painted them using acrylic paint then added some metallic leaf and varnished them.


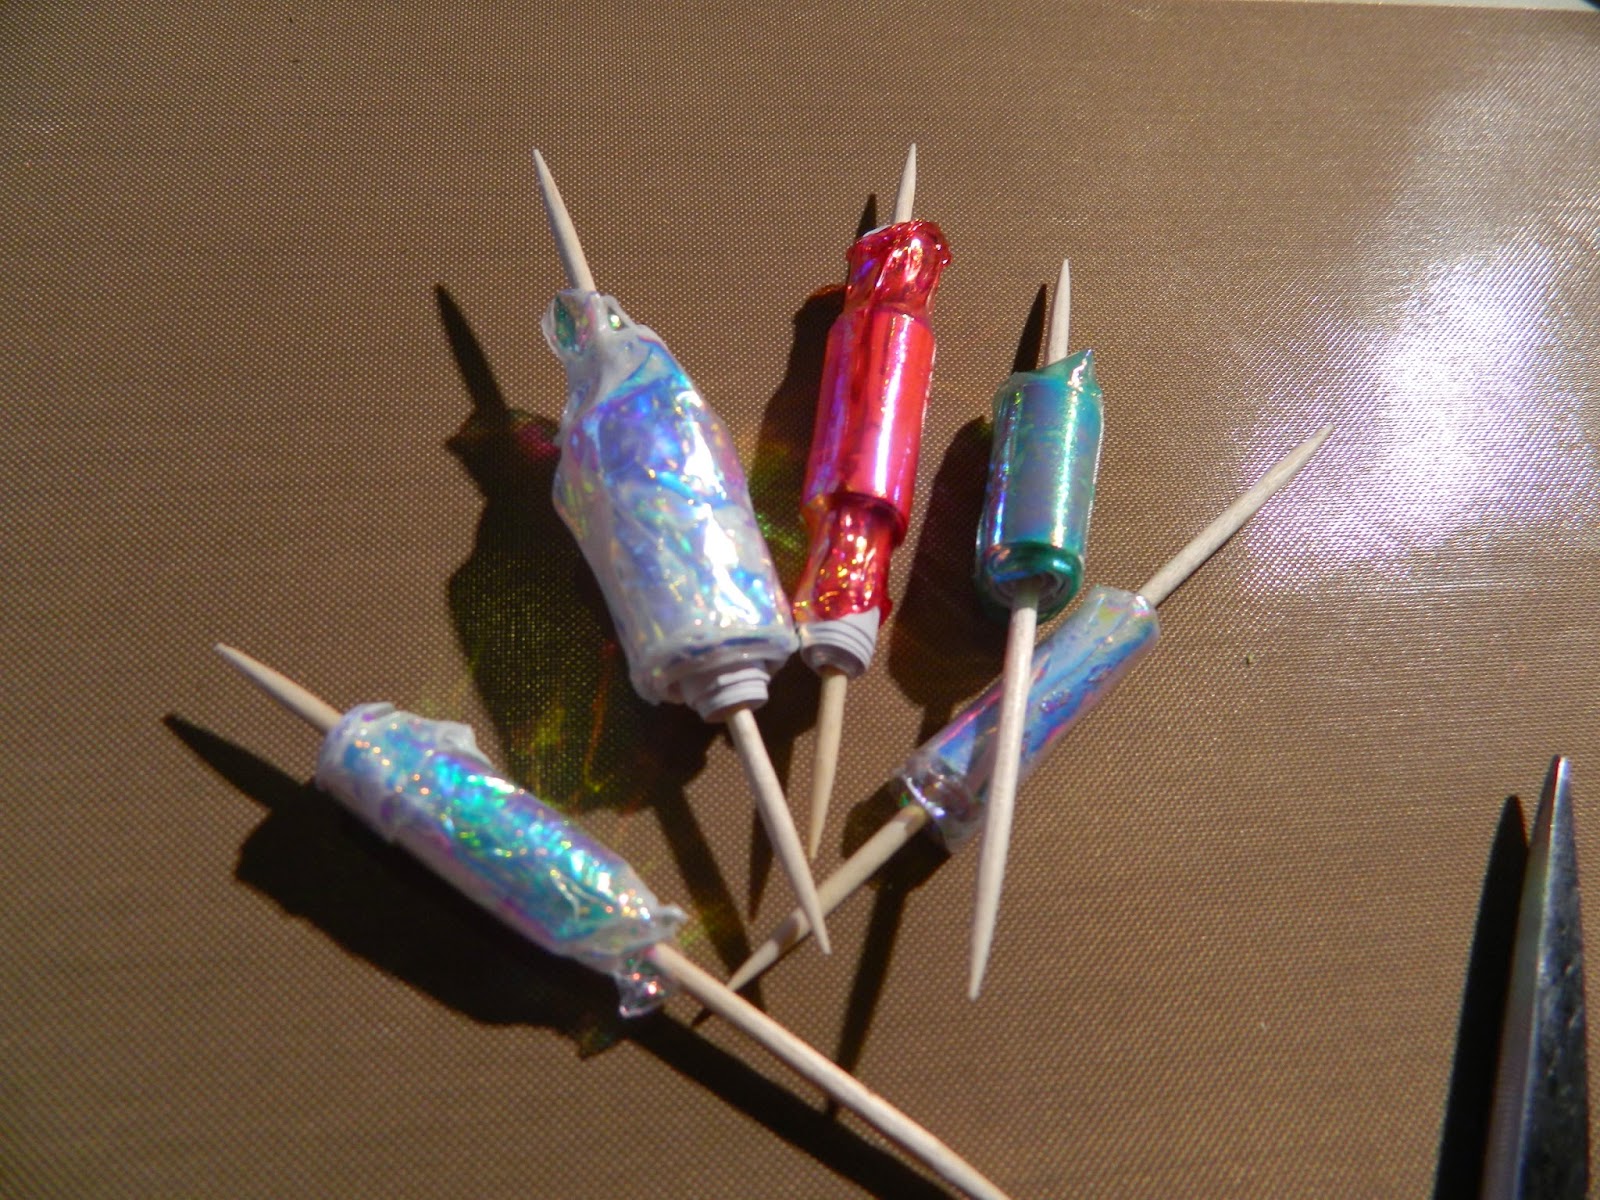
While the varnish was drying on my clay beads I prepared the paper and shrink magic (plastic) shapes to harden in the enamel. Cutting strips of metallic crepe paper and winding it round lolly pop sticks then gluing the end down.


I coloured some of the clear shrink plastic with alcohol inks before cutting the shapes out and the holes with a hole punch, because they shrink you need to remember to make them about 3 times bigger than the size of pendant/charm you want. I then used my heat gun to shrink them down and set them hard. 


These paper beads were made by wrapping Angelina film over the top and melting it on with my heat gun.


To set them all hard I melted some UTEE in my Ranger meltpot and dipped them in, it dried pretty fast so you only need to hold them for about 30 seconds before moving onto the next. This enamel melts at high temp so the beads are sure to stay solid.