2 Feb 2015

Tribal and Geometric Sketchbook Pages

This is part of my "Inspire" Project which I entitled "The Olmec Queen"

Key Words:
Fused, Distorted, Bold, Skeletal Structure, Tribal, Colourful, Chunky, Beads.

The aim of this project was material research and exploration. These are my sketchbook pages. There is another post called "Tribal Inspired Jewellery Bead Design" which is also part of this project.

I have had a fascination with beads for 10 years now and they often feature in my work in some form or another. I used some of my many photographs of my collections in this project to generate pattern form and shape. I made lots of stencils and moved from rounded shapes to geometric shapes then combined the 2.


Reactive Dye Colour Bleeding


Creating a colour bleed pattern with reactive dyes is easy and fun by randomly splatter the reactive dye on  the reverse side of a silk screen in different colours. You can then make the colours bleed by either using a pipette and water to make the colours run into each other or use clear plastic shrink wrap like I did here.


Once they are fully dry the Manutex paste needs rinsing off in cold water then they need to be steamed, here is me using the steamer.


Removing the pins....


Tie Dye to CAD Digital Textile Print

 I love tie dyeing. I always feel so excited when I open them up to see what unique pattern will be on the fabric. I wanted to use my Photoshop skills to create a repeated pattern for textiles.


 This is a cropped scanned image of a section of the red and blue one.


 I then began to break it down using mask tools, fill in the spaces with other sections then repeat these are the four steps.


I used the colour alteration functions and inverse to get these variations 


 In these two examples I used the fx to create fuzzy shadows around the outlines and inverse to give them a neon glow


This last example is my favorite, I used a smudge art filter to make it fuzzy 


Tribal Inspired Jewellery Bead Design


This is part of a project I did in my final year of uni called "Inspire" The aim was to research materials. I chose a tribal theme and bead making for my final pieces.

Trend research for Tribal Jewellery


The CAD generated theme board I did for my final project.


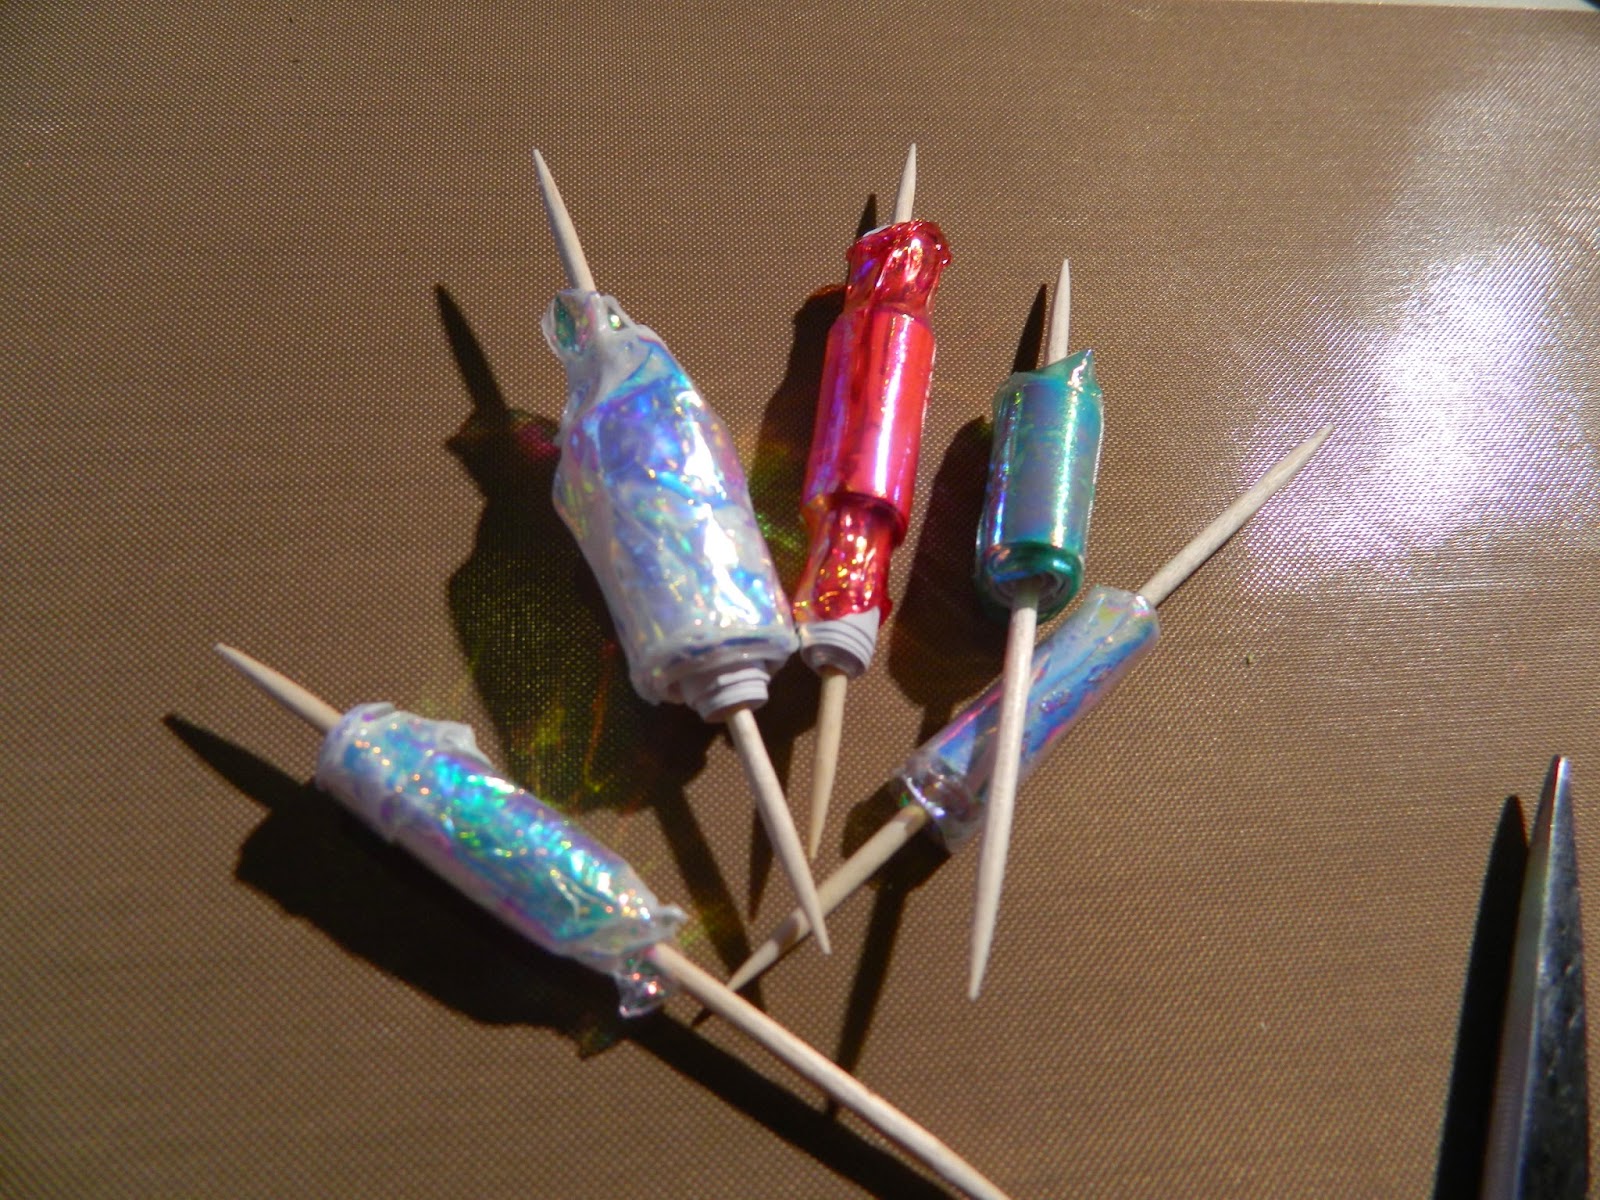
 These beads were all made by wrapping fabric, melting iridescent film, metallic threads and plastics around a metal skewer then blasting with the heat gun. I then threaded them onto pins with metal beads and attached them to some fabric I had dyed to create a "body necklace"


These beads I made using polymorph plastic which was really fun. I meted the pellets in some warm water then molded them into these shapes using a thick pin to make the holes. I painted them using acrylics and gave them a metallic shimmer using gilders paste.


I love making beads!


Making chunky beads from scratch


Collection of beads made from clay, crepe paper, Angelina film and shrink magic set in UTEE (ultra thick embossing enamel)


 I used various stamps to emboss a pattern into the clay and cutters to make shapes and also some free hand molding to make shapes. Using a 70mm head pin to make the holes before baking the clay.


My concentrating face :-)


 I painted them using acrylic paint then added some metallic leaf and varnished them.


While the varnish was drying on my clay beads I prepared the paper and shrink magic (plastic) shapes to harden in the enamel. Cutting strips of metallic crepe paper and winding it round lolly pop sticks then gluing the end down.


I coloured some of the clear shrink plastic with alcohol inks before cutting the shapes out and the holes with a hole punch, because they shrink you need to remember to make them about 3 times bigger than the size of pendant/charm you want. I then used my heat gun to shrink them down and set them hard. 


These paper beads were made by wrapping Angelina film over the top and melting it on with my heat gun.


To set them all hard I melted some UTEE in my Ranger meltpot and dipped them in, it dried pretty fast so you only need to hold them for about 30 seconds before moving onto the next. This enamel melts at high temp so the beads are sure to stay solid.


13 Mar 2014

Large Moody Canvas

A large moody floral/leafy abstract canvas I was asked to do for a friend. 
I make my own stencils and draw directly onto the canvas adding 1 layer at a time. This painting is called "Midnight Vine" and I used spray paints and acrylic paints, brushes and sponges. It took me 6 days to get to the final point because there was drying times in-between layers.


I love to layer I think the more layers the better!


20 Jan 2014

Multi Beaded Tribal Sets Jan 2014


I used all sorts of beads and buttons to make these sets, plastic, wood, gemstone, glass, ceramic etc
The main techniques are wire wrapping and knotting....I like the textures of the thick threads sticking out all over it gives the pieces a easy going beach day feel to them perfect for summer. 

Here are some more sets in different colours.....


My favorite set below...the photos don't show how truly gorgeous the colours are.... like the large copper nugget beads which are so rich and vibrant copper precious metal.


10 Dec 2013

Merry Christmas Buntin


I followed a YouTube demonstration just to get the general gist of how to make these as not really tried it before but it is surprisingly simple but slightly fiddly. I used a sizzix die for the letters which were backed onto stiff backing however the die did not cut through properly but made a score easy enough for me to snip them out. I used 5 different fabrics and made 3 flags of each, 16cm long by 11cm wide with a 0.5cm seam.
I found it easier to iron the binding tape in half before pinning in the flags it just made the last bit easier and neater. The whole thing took me about 2 hours. Now, where to put it!

Christmas Card Time!


I made some vintage style Christmas cards using a snowflake background stamp and a text stamp. I coloured and blended the edges using the Tim Holtz distress ink pads and blending tool by Ranger, scuffing the edges of the paper with a Stanley. The little robins I drew myself with pens and shaded in with a cotton bud and ink pads. This card is for my boyfriends mum hope she likes it the colours match her living room.


5 Oct 2012

Dyeing plastics

Today I learn't how to dye plastics in a hot water dye bath. It was really easy, quick, effective and fun. I put colour onto every day plastics such as packaging, frosted acetate, white PVC, acrylic tubing etc.
 I mixed a liter of water with 20ml of carrier and 1 gram of disperse dye pigment powder. I then boiled them to 80 degrees, let the pot simmer and added my substrates. The items can be left in from 1 minute to 10 minutes or even longer but need to be rinsed with cold water after. This is a good method  to do dip dye. Just hold one side in with tongs in one colour then the reverse in another colour. Quite effective.