

I wanted to make my mum something nice to take with her when she moves abroad and thought a quilt would do the trick. I did not use a pattern for this I just kind of made it up as I went along. It turned out really neat for a first attempt too. Something like this can be made with any fabric pieces or from unwanted clothes I just spent money on nice fabric because I wanted to treat my mum.
Firstly I purchased my fabric in fat quarter's from eBay or otherwise known as FQ. A fat quarter is a quarter of a yard or meter depending on weather the retailer uses imperial or metric measurements (just encase you did not know). I wanted the quilt to be 50x66 inches approx so I needed around 13 FQ for the top side and one single piece of fabric for the reverse side. The fabrics I bought are below ( I also used some of my own stock)

For my project I used:
A sewing machine with a free hand embroidery foot and an ordinary presser foot
Threads
Fabric for the patches and coordinating fabric for the reverse side
Fabric scissors
Small scissors for trimming threads
Your patch template (I used a 10x10 inch square of thick card)
6.5 inch embroidery hoop
Lots of pins
Ruler
Fabric chalk
Pencil
Ruler
Paper
Iron
Enough wadding to fill the quilt
Lots of floor space!
Firstly I used the patch template to draw and cut all the patches out from the fabric pieces, making sure they are all exactly the same size. I cut 35 in total and then ironed all of them flat.

Simple reverse applique technique
I wanted to add some detail to some of the squares of plain fabric by using the reverse applique technique. Simple circles are good because they fit inside the embroidery hoop easily and everyone always has the perfect circle stencil...a roll of tape! So I drew a square on a piece of paper which fit my roll of tape onto it with approx 1cm gap all the way around. This square is the reverse applique template. I used this to draw more squares on the left over plain fabric (I had some left from my FQ's) and cut out approx 12 smaller squares. It is important that these squares are ironed flat.

Next I positioned one of the small squares in the center of a large square and pinned each corner as far to the edge as possible with the pin heads on the reverse side. This is so that when I came to put them in the embroidery hoop I could fit it in with the pins still in tact. Once they are all pinned I turned them over and positioned the tape in the middle using the pins as a guide. I then drew round the edge of the tape with fabric chalk.

Now I positioned the square in the embroidery hoop with the chalk circle in the center. Using a straight stitch and the free hand embroidery foot I sewed over the chalk circle once. Using some sharp pointy scissors I poked into the top layer carefully and cut away the inner circle as close to the stitching as possible. Try not to cut into the bottom layer of fabric or into the stitches or you may need to start again. Repeat this on all of them.

Using zig zag stitch sew around where the 2 fabrics meet to create a neat line and hide the edge of the top fabric. Once it looks neat take the fabric out of the embroidery hoop and trim the excess fabric on the reverse side this is mostly important for lighter colours because the smaller square attached underneath can show through. Iron out any creases made by the embroidery hoop.

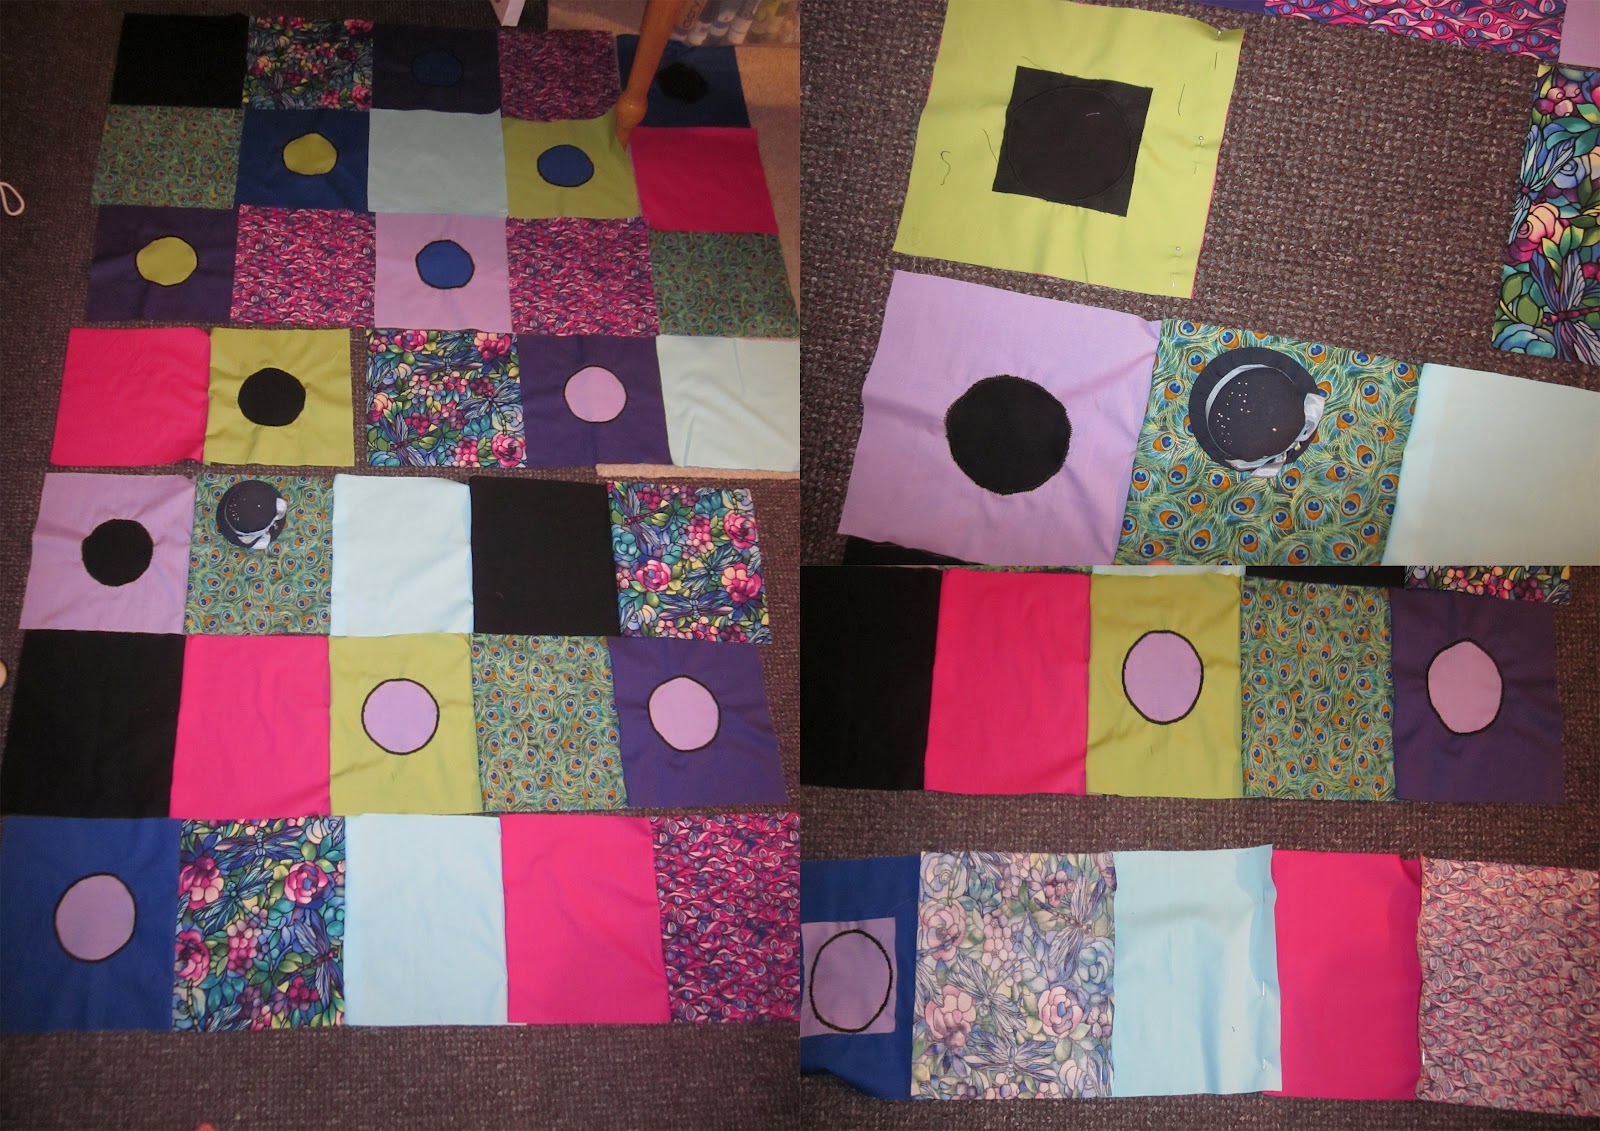
Now all the squares are ready to be laid out, lots of floor space is needed for this. I did no particular patter for the patches I just laid them out trying not to let the same ones sit next to each other.
Once I was happy with the order of the patches I began to pin them together in rows. I started with the bottom left hand corner, laying the adjacent patch over the top right sides together and repeated this across each row.
Then I sewed them together using the ordinary presser foot and straight stitch with a 1cm seam. So I ended up with 7 rows of 5 patches sewed together. It is important to iron the seams flat before moving onto the next stage or there will be lumps and bumps at the seams underneath the top layer of the quilt. Do the same process for the 7 rows, pin them right sides together, sew a 1cm seam then iron the seams flat.


Once I had all the
squares sewn together I was ready to make the bottom part of the quilt
cover. I laid a large piece of purple cotton fabric on the floor and
pinned my patchwork piece to the top. I then cut round the edges to make
them both the same size. Then right sides together I used my machine to attach them with a 1cm seam along the 2 long sides and one of the shorter side.

Then I turned the quilt cover inside out so the right sides are on the outside and laid my wadding over the top. Pinning it to the open side to keep it still I then trimmed it down to the same size as the quilt cover. The quilt cover needs to be the right way around with the wadding inside pinned at the edges of the sewn seams with the pins on the outside so they can be removed once the quilt is sewn up.

Now I had the wadding positioned inside and held by pins I was ready to sew the open side together. The way I did it was to fold the raw edges inwards about a cm or a bit more and pin them together all the way down to the end as shown below. I then sewed them together about 5mm away from the edge.

The final step was to make sure the wadding does not move around inside the quilt which can be annoying trying to shake it back into place when there is no opening. So I sewed along the line where 2 patched meet in each corner of the quilt. The second pic below shows the reverse side of the quilt where I stitched the wadding in place.

